Rebuilding XACT files for FNA/Monogame

When trying to use the original XACT files for an XNA project, sometimes they just won't work. Now why is this? Generally, I've seen that the issue is that the files are big-endian instead of little-endian.

How do you know if a file is big-endian or little-endian? Open them in a text editor. Wave banks start with "WBND", sound banks start with "SDBK", and settings files start with "XGSF". If any of these strings are reversed, then your file is big-endian.

An Introduction to XACT

XACT is an audio framework used by the DirectX SDK and many XNA projects. There are a variety of different file types for this.

  • Project Files (XAP)
    These are used by the XACT editing utility to pull up the resources of an individual project and their various links and settings.
  • Wave Banks (XWB)
    A collection of waves.
  • Sound Banks (XSB)
    A collection of sounds (waves with properties like volume and pitch) and cues (triggers for one or more sounds).
  • Global Settings (XGS)
    Sets the rules and settings for sounds. Includes categories (groups a set of sounds so they have the same settings), variables (the programmer can reference these in their code to control sound parameters at runtime), DSP presets (for effects like reverb), and compression presets (which can be applied to waves or wave banks).

Building an XACT project creates the XWB, XSB, and XGS files for that project for whatever platform you specified (Windows is little-endian, Xbox 360 is big-endian). Please note that you cannot load these files back into the XACT editor. You will need to have the original XAP project file.

This is where the issue is. When extracting these files from an XNA project, you usually don't have the XAP that enables easy editing. Which means we have to make it ourselves.

How to Tear Apart XACT Files

Wave banks are the easiest to start with. These are just collections of raw wave data that we need to separate out into the individual files. There is a utility for this called unxwb.

Once you have the individual files, you may notice that they aren't named. We'll come back to that later. They may also not play in VLC or Windows Media Player. This is a format problem that's solved by opening the files in Audacity and exporting them as WAV files.

Sound banks require digging into the file to find certain values. Thankfully someone wrote a file specification on this. Note the plain text cue names at the end of the file. It's incredibly common to have a cue for each wave file and to name them after that file. Basically, these are your wave names.

For global settings files, category and variable names are written in plain text.


Putting Them Back Together

You will need the XACT editor for this. Here's a guide on one of the ways to get it. You can also download it as standalone here.

  • Open the editor and create a new project. It doesn't matter what you name this.
  • Create a wave bank under "Wave Banks" and name it after your original one. Put all of your WAV files in here.
  • Add a sound bank under "Sound Banks" and name this after your original one too. Drag all of your wave bank files here to create sounds. 
  • To make a cue, right click and select "New Cue". You can add sounds to a cue by dragging them to that cue. If you click on the cue itself, you will see a panel with all of the sound names and their play probability. If you have multiple sounds here, you can move them around to change the play order. On the far left, there is another panel that contains playlist settings so you can have it shuffle or play in order.
  • To change the category of a sound, drag it to the relevant category in the main left side panel.
  • To edit variables, double click on the variable to open a window that has settings for intial value, min, max, and visibility. Other XACT settings such as DSP and compression presets are accessible in the side panel.
  • Go to "View" at the top and select your platform from the dropdown menu. For example, clicking "View Windows Properties" will build it for Windows. Then go to "File > Build" to actually build it.

Output files will be located in the same directory as the project. Replace your existing XACT files with these new ones.

Decoding audio XNBs (WAV and XMA)

 When extracting sound effects from XNB containers, I've found they can exist in one of two formats:

  • WAV files
  • XMA files (which are WAV files with a certain codec)
Let's take a look at two different uncompressed .XNBs and break them down according to WAV file specs:

XNB1.xnb

XNB Header
58 4e 42 78 05 01 8b 88 00 00 01 31 4d 69 63 72 6f 73 6f 66 74 2e 58 6e 61 2e 46 72 61 6d 65 77 6f 72 6b 2e 43 6f 6e 74 65 6e 74 2e 53 6f 75 6e 64 45 66 66 65 63 74 52 65 61 64 65 72 00 00 00 00 00 01 
34 00 00 00 01 66 00 01 00 00 ac 5e 00 00 4a 66 00 02 00 10 00 22 00 01 00 00 00 01 00 01 58 00 00 00 80 00 00 00 00 00 00 01 56 4c 00 00 01 80 00 01 56 80 00 04
00 02 00 88 00 00 30 00 01 00 08 8f fc 03 80 00 17 d4 73 17 49 bd 24 61 44 c2 8c 27 0c 4f 7c 2a af d7 d5 
Song Starts
    • 34 00 00 00 -- Subheader size, 16 + extra data size (36 bytes)
    • 01 66 -- Audio format (XMA)
    • 00 01 -- Number of channels (1 = mono)
    • 00 00 ac 5e -- Sample rate
    • 00 00 4a 66 -- Byte rate
    • 00 02 -- Number of bytes in sample (2 bytes)
    • 00 10 -- Bits per sample (16 bits)
    • 00 22 -- Extra data size (34 bytes)
    • 34 00 00 00 01 66 00 01 00 00 ac 5e 00 00 4a 66 00 02 00 10 00 22 00 01 00 00 00 01 00 01 58 00 00 00 80 00 00 00 00 00 00 01 56 4c 00 00 01 80 00 01 56 80 00 04  -- Extra data


XNB2.xnb

XNB Header
58 4e 42 77 05 00 43 e1 00 00 01 31 4d 69 63 72 6f 73 6f 66 74 2e 58 6e 61 2e 46 72 61 6d 65 77 6f 72 6b 2e 43 6f 6e 74 65 6e 74 2e 53 6f 75 6e 64 45 66 66 65 63 74 52 65 61 64 65 72 00 00 00 00 00 01  
12 00 00 00 01 00 01 00 44 ac 00 00 88 58 01 00 02 00 10 00  
00 00 da e0 00 00 73 23 43 35 25 15 d5 26 b4 1b 24 18 09 1b d0 13 e7 14 62 12 26 10 c3 0f 95 0d c4 0c a0 0b 75 0a b7 09 c0 08 03 08 57 07 a8 06 1a 06 8d 05 0f 05 a7 03 f1 ad 55 a4 1e d8 82 b4 22 d0  
Song Starts
    • 12 00 00 00 -- Subheader size (16 bytes)
    • 01 00 -- Audio format (PCM)
    • 01 00 -- Number of channels (1 = mono)
    • 44 ac 00 00 -- Sample rate
    • 88 58 01 00 -- Byte rate
    • 02 00 -- Number of bytes in sample (2 bytes)
    • 10 00 -- Bits per sample (16 bits)
    • 00 00 -- Extra data size (0 bytes) Not used with PCM


To extract a playable file out of an XNB, you will need to convert the XMA within to a more widely known codec. I used vgmstream, which can convert any kind of audio XNB to common WAV. You can then convert them back to XNB for use in your games.

TKA Archive - Plastic Kitteh

One piece of Techno Kitten Adventure merchandise included handmade cat statues of Jetpack Kitten in varying colors. Per the description:

Your TKA REAL-LIFE PLASTIC KITTEH! Every TKA Real-Life Plastic Kitteh! is a unique, hand-made, hand-painted & hand-gliterfied gift of joy! No two are the same and there will never be a duplicate of your one-of-a-kind new friend. Techno Kitten is looking forward to continuing his Adventure on your shelf!

Get them at shop.elitegudz.com/technokit/technokitten.html

This Kitteh stands around 10" high when attached to his base. He may be a little shorter or a little taller, but he will love you all the same :)

Hand-Made by Mr. Den

*TKA Real-Life Plastic Kitteh may contain small parts, so don't eat them! Also, sparkles may get all over the place, so handle with care!

These were sold on Elite Gudz's online store for $50 and are no longer available.


TKA Archive - Promotional Content

While Techno Kitten Adventure was originally released in 2010, the version we know came out on June 7, 2011. These are some promotional posters, screenshots, and videos for that re-release.

https://www.youtube.com/watch?v=Tecmm3lbsNM (Original release teaser)
https://www.youtube.com/watch?v=21AIzwtZXpE (Techno Kitten in Times Square)
https://www.youtube.com/watch?v=CwQb8tfb2SQ (Techno Viking)
https://www.youtube.com/watch?v=hbWqBmheMhc (Rave Practice, flashing lights warning)
https://www.youtube.com/watch?v=-YFLKOmQzPo (The New Employee)


There was also a contest to celebrate the release of Meat Pack a few months later:
https://www.destructoid.com/win-100-and-meats-in-this-techno-kitten-giveaway


TKA Archive - Kitteh Parteh

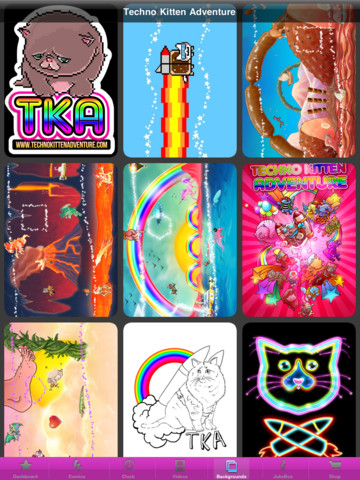
Kitteh Parteh was an iOS app from 2012, during the height of Techno Kitten Adventure's popularity. Per the iTunes description:

Are you a kitten with a jetpack fueled by hopes and dreams? Have you ever really touched the blue blue sky?

Then U R invited to the Kitteh Parteh! It's an app for everything in the Techno Kitten Adventure universe!

* TKA Boombox with music from the game
* Wake up with a TKA Alarm Clock
* Read the FREE TKA Comic
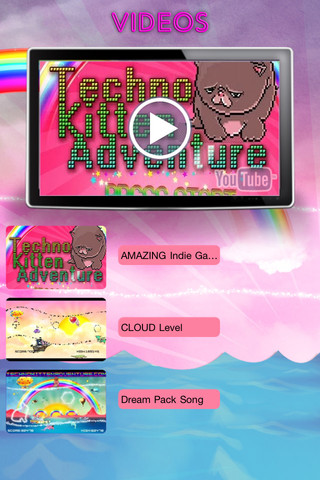
* Watch all the best TKA Videos (& funny kitteh vids)
* TKA Backgrounds for your iPhone & iPad
* TKA Twitter & Facebook feeds
* Universal & FREE :)

This was an app that featured extra content related to TKA such as music, YouTube videos, a tie-in comic, and custom backgrounds. The .IPA for this application has been lost to time but I believe the content may exist somewhere else.

iTunes store link, archived 


Converting Shadertoy code to DirectX HLSL

Lessons learned from someone who didn't know GLSL, HLSL, or any kind of shader code a week ago.

Shadertoy is an online tool that uses WebGL (a version of GLSL) to write and run shader code. You don't need a compiler or an IDE, and you can even use it on mobile.

Shadertoy

        void mainImage( out vec4 fragColor, in vec2 fragCoord )
        {
                vec2 uv = fragCoord/iResolution.xy;
                vec4 col = texture(iChannel0, uv);
                fragColor = col;
        }

Since Shadertoy code is almost exclusively pixel shaders, your HLSL code will be a pixel shader as well. In HLSL, fragColor is COLOR0, fragCoord is SV_POSITION, and uv is TEXCOORD0. This means your mainImage() function will look like

HLSL

        float4 MainPS(float4 pos : SV_POSITION, float4 color0 : COLOR0, float2 texCoord : TEXCOORD0) : COLOR
        {
                float2 iResolution = float2(<resolutionX>, <resolutionY>);
                float4 color = tex2D(<sampler>, texCoord);
                return color;
        

Everything else is a 1:1 conversion between GLSL and HLSL. For example, vec4 becomes float4 and mix() becomes lerp(). Here are a few reference lists for that:

I hate .cso shader files

When you compile a high level programming language, it gets converted into an executable containing, for the most part, assembly code.

I like to say that most of an XNA project's assets can be recovered from the final deployed package. They come in XNB containers so you only need to uncompress them.

This is not true for .cso (Compiled Shader Object) files, which are often used as camera/texture effects in XNA.

When working on a project in XNA Game Studio, HLSL shaders are compiled into binary .cso files for usage with your code. They cannot be converted back into HLSL files, much like how most executables also cannot be converted back into source code.

The pain is real.

.ccgame files and what to do with them

Per RB Whitaker's fantastic wiki, .ccgame files (XNA Creators Club Game files) are packaged XNA projects for sharing with other XNA users or for deployment on Xbox 360/Zune.

Now, I have the XNA Game Studio 4.0 Platform Tools. When you install them, they're located in "Program Files (x86)\Common Files\Microsoft Shared\XNA" and the tool in question is called XnaPack. Open your .ccgame file with this application.

"Error 2164: The packages game does not have a valid target registered for its supported platform(s). You must register at least one target with XNA Game Studio Device Center before unpackaging this game. Use /listplatforms to see the list of platforms supported by this game package."

You need to add a device (Xbox 360 or Zune) with an active connection before you can unpackage it.

For Xbox, this requires an XNA Creators Club subscription.

These subscriptions were discontinued in 2015.

No worries though, as you can still unpack these files albeit with a bit more effort. Open your .ccgame file as archive with 7-Zip File Manager and you'll see a series of numbered files along with XCabInfo.resources.

File 0 is always your executable. This can be decompiled with ILSpy (available as a Visual Studio extension) into the C# source code.

Everything else is XNB assets. XCabInfo.resources provides a list of their original names along with an embedded PNG package icon. Luckily the icon isn't compressed so you can just select everything from %PNG to IEND®B`‚ and save as image.

You can tell that the other numbered files are XNB assets because they start with the XNBx header when viewed in a text editor.

The pain of the XNB container fomat - Image extraction

As a refresher, XNBs are compressed XNA Game Studio project assets. Like a ZIP file but more proprietary. XNBs can contain things such as images, sound, and compiled HLSL effects. When running a game, Microsoft.Xna.Framework.Content loads these assets into the code, so it must be that Content holds the content loading code.

Per the XNB file format specifications, the contents of XNBs are usually compressed using the Xbox XMemCompress API, which is also proprietary. That means that the only method of extracting these contents is by reverse engineering Microsoft.Xna.Framework.Content's code. Thankfully someone else has already solved this problem. XNB extractors currently exist such as TConvert, a tool meant to convert Terraria's XNB files.

But this is where the fun part comes in: TConvert and most of the other XNB converters out there only deal with XNA Game Studio 4.0 files. If you have an earlier version, such as XNB files generated by XNA Game Studio 3.1, it won't work.

Does this mean that XNA 3.1 has a different format than 4.0? I'm not entirely sure since XNA 3.1 documentation doesn't exist on the internet. But we can use a 3.1 version of Microsoft.Xna.Framework.Content to do the conversion for us.

Steps

  1. Create an XNA project that uses Microsoft.Xna.Framework 3.1
  2. Have it load the images into Texture2D variables
  3. Save those variables as PNGs

Implementation

public Game1() {
base.Content.RootDirectory = "Content";
}

protected override void Initialize() {
base.Initialize();
}

        protected override void LoadContent() {
        Texture2D imageToSave = base.Content.Load<Texture2D>("Graphics//image");
                imageToSave.Save("savedImage.png", ImageFileFormat.Png);
        }

protected override void UnloadContent() { }

protected override void Update(GameTime gameTime) {
base.Update(gameTime);
}

protected override void Draw(GameTime gameTime) {
spriteBatch.Begin(SpriteBlendMode.None);
GraphicsDevice.Clear(Color.CornflowerBlue);
spriteBatch.End();
}


But wait, there's more.

Your output image will have the color channels swapped. You'll need to swap ARGB to BGRA. Thankfully I made a program that does this.


What do you do for audio and effect files? That's still a work in progress.